

Delightful Homemade Bird's Milk Cake with Gelatin
Discover how to create the luscious Bird's Milk Cake with gelatin at home—a soft, creamy dessert that’s perfect for any occasion. Follow our easy step-by-step guide featuring tips, photos, and expert advice to craft this elegant treat that will impress your guests.
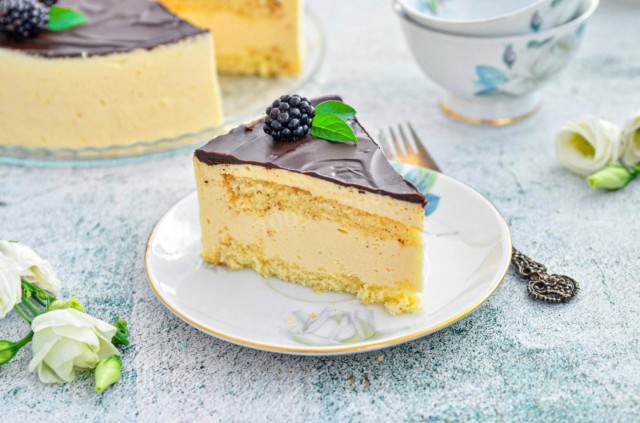
Experience the gentle, creamy flavor and melt-in-your-mouth texture of the classic Bird's Milk Cake made with gelatin. This delightful dessert is surprisingly simple to make at home, requiring only basic ingredients and straightforward steps. Perfect for tea time or celebrations, it’s sure to become a favorite in your kitchen!
Step-by-Step Preparation
Total time: 8 hours
Step 1:

Begin by preparing the sponge cake base. Gather all necessary ingredients and get ready to bake a light, airy cake.
Step 2:

Whip the eggs and sugar together at medium speed until the mixture is fluffy and pale. This technique traps uniform air bubbles, ensuring the sponge rises beautifully without collapsing.
Step 3:

Sift the flour combined with baking powder into the egg mixture carefully.
Step 4:

Gently fold the flour into the eggs using a silicone spatula to preserve the air bubbles. Add vegetable oil and hot water, then mix until smooth.
Step 5:

Prepare your baking pan by lightly greasing the bottom with vegetable oil. Avoid greasing the sides to help the sponge rise evenly. Use a 20 cm diameter ring mold or any shape you prefer.
Step 6:

Bake the sponge at 170°C (340°F) for 25-30 minutes until golden brown. Test doneness with a toothpick; it should come out clean. Allow the cake to cool completely before removing it from the pan.
Step 7:

Now, prepare the creamy souffle filling. Make sure your butter is softened to room temperature for a smooth texture.
Step 8:

Soak gelatin in cold water for about 20 minutes to let it bloom fully.
Step 9:

Separate eggs carefully into yolks and whites, ensuring no yolk contaminates the whites for optimal whipping.
Step 10:

Whisk the yolks with sugar until light and fluffy.
Step 11:

Add milk and flour to the yolk mixture and whisk again until smooth.
Step 12:

Pour the mixture into a heavy-bottomed saucepan and cook over low heat, stirring constantly until it thickens. Avoid overheating to prevent curdling. Remove from heat as it starts to thicken, then cool.
Step 13:

Beat the softened butter until fluffy. Gradually incorporate the cooled custard base, adding a tablespoon at a time while mixing continuously to create a smooth, creamy filling.
Step 14:

Whip the egg whites with the remaining sugar until they form stiff peaks. This may take some time but is crucial for the souffle’s lightness.
Step 15:

Heat the bloomed gelatin over low heat, stirring gently until fully dissolved, but do not boil to maintain its gelling power.
Step 16:

Allow the gelatin to cool slightly, then blend it into the whipped egg whites. Beat again to combine thoroughly.
Step 17:

Fold the butter and custard cream into the egg white and gelatin mixture in portions, stirring gently to form a smooth, slightly fluid souffle.
Step 18:

If desired, slice the sponge cake horizontally into two layers. For wider pans, you may keep it as a single layer.
Step 19:

Assemble the cake in a springform pan. Place the sponge base at the bottom, ideally slightly smaller than the pan to allow the souffle to form a neat edge.
Step 20:

Pour the souffle cream over the sponge, reserving about one-fifth for the top layer. If your cake is shorter, you may use all the cream at once.
Step 21:

Add the second sponge layer on top, and cover with the remaining souffle cream.
Step 22:

Smooth the surface gently with a spoon and refrigerate the cake until the souffle sets completely.
Step 23:

Prepare a rich chocolate glaze using high-quality dark chocolate for a perfect balance of sweetness and bitterness.
Step 24:

Melt the chocolate carefully, using a microwave or double boiler, until smooth and fluid.
Step 25:

Incorporate softened butter into the melted chocolate to add richness and shine.
Step 26:

Pour in hot milk gradually, stirring to achieve a silky, uniform glaze.
Step 27:

Pour the glossy glaze over the chilled cake and spread gently with a spoon. The natural unevenness adds charm and texture. Refrigerate until the glaze sets. To remove the cake, run a sharp knife along the pan’s edges for a clean release.
Explore useful articles in Homemade Cakes as of 18-10-2024. The article titled " Delightful Homemade Bird's Milk Cake with Gelatin " offers in-depth analysis and practical advice in the Homemade Cakes field. Each article is carefully crafted by experts to provide maximum value to readers.
The " Delightful Homemade Bird's Milk Cake with Gelatin " article expands your knowledge in Homemade Cakes, keeps you informed about the latest developments, and helps you make well-informed decisions. Each article is based on unique content, ensuring originality and quality.