

Transforming a Cold Storage Balcony into a Cozy Additional Room: How to Insulate Your Balcony
Follow this comprehensive guide from Zamona to convert your chilly balcony storage into a warm, inviting extra room perfect for a home office or relaxation area.
Artëm Kozoriz presents a detailed step-by-step guide complete with photos and videos.
1. Understand the Basics
Difference Between a Balcony and a Loggia
First, let's clearly distinguish these two terms. Both are glazed spaces, which leads many to call the resulting area a balcony, though this is technically incorrect. Some mistakenly believe that installing windows on a balcony automatically converts it into a loggia.

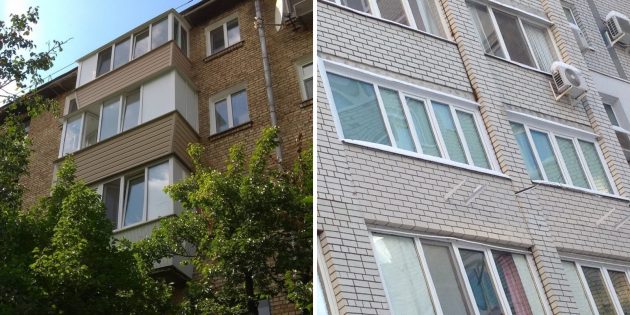
The key difference lies in structure: a balcony lacks side walls and extends beyond the building facade, while a loggia has side walls and is recessed into the building. Thus, outdoor air affects a balcony from three sides, but only one or two sides for a loggia if it’s a corner apartment.
Expected Results
Both can be insulated, but the outcome differs significantly. A well-insulated loggia can function like a regular room. With a heat source, it becomes a fully livable space year-round.
Due to the absence of structural walls, insulated balconies have much lower thermal resistance, making them comfortable only until late autumn. Although adding extra insulation layers could improve this, it’s impractical given the limited space, which would be greatly reduced after insulation.
Glazing Considerations
Since windows account for about 25% of heat loss, insulating makes sense only if energy-efficient windows are installed. Single-pane wooden frames must be replaced with modern alternatives first.
Double-glazed units with higher thermal resistance are heavy and can typically be installed only on loggias. Balcony slabs often have limited load capacity, making such windows unsuitable.
2. Plan Your Structure
Before starting, decide on the insulation type, wall finishing options, floor covering, and heating method. These choices will shape your construction and installation process.
Insulation Material
Since insulation is applied from the inside, using vapor-impermeable materials is crucial to prevent condensation and mold.

Extruded polystyrene foam (XPS) is ideal. When installed with sealed joints, it creates a 'thermos' effect, effectively blocking cold air and retaining heat without sacrificing much space.
Some consider polystyrene toxic, but this is a misconception. Though flammable and releasing harmful substances above 60°C, XPS is safely enclosed behind finishes.
Wall Finishes
After insulation, all types of finishes are possible. The insulation technique varies slightly depending on the chosen finish.
- Wooden paneling, PVC, or MDF panels require a frame for mounting.
- Decorative plaster or putty with painting can be applied directly on insulation.
- Wallpaper is easiest to apply over drywall fixed on a wooden frame.
Floor Covering
The insulated loggia floor is similar to room floors, allowing various finishes. Each requires a specific subfloor:
- Laminate, linoleum, or carpet are laid over plywood, particleboard (DSP), cement-bonded particleboard (CSP), or oriented strand board (OSB) fixed on wooden joists.
- Tiles and porcelain stoneware need a concrete screed.
Balcony slabs have limited load capacity, so only wooden joist floors are allowed. Loggias with sturdier slabs can also have screeds for tile installations.
Electric underfloor heating can be installed in both cases: infrared film for joist floors and heating cables or mats for screeds.
Heating Options
Insulation alone prevents freezing and slightly raises temperature compared to outdoors. For comfortable winter use, a heat source is essential.
- Electric underfloor heating: the most effective but costly and complex to install.
- Convector heaters: placed near exterior walls, used only on cold days or when occupied.
- Central heating radiators: legally prohibited to move to balconies or loggias, but if partitions are removed or doors remain open, room radiators can help heat the space.
3. Prepare Surfaces
Remove all items, shelves, and hooks. Strip old paint and plaster. Treat any mold spots with antifungal agents and thoroughly dry surfaces.

Seal all gaps around the perimeter, including joints with side walls, floor, and ceiling. Remove old plaster in joints and fill with expanding foam.
The goal is to block any cold air infiltration and make the room as airtight as possible.
4. Install Electrical Outlets and Lighting
If planning to use the space as an office or lounge, install wiring, outlets, switches, and lighting beforehand.

Run cables along the wall adjoining the room, which is uninsulated, making it easy to conceal wiring within the frame or plaster layer. Connect outlets and lighting to the nearest room socket. For underfloor heating, run a dedicated cable from the distribution panel.
5. Learn How to Work with XPS
XPS panels come in 60 × 120 cm sheets, 20 to 150 mm thick, featuring an L-shaped interlocking edge to ease installation and prevent drafts.

Attach XPS to walls using spray adhesive foam applied around edges and center, mechanical anchors with plastic or metal cores, or full-surface adhesive mixtures.
Seal all joints to form a continuous insulation layer. Leave 10–15 mm gaps near corners, ceiling, and floor to fill later with expanding foam. Seal panel joints with adhesive foam or foil tape.

Achieve the required thickness with one or two layers. Two layers are preferable for tight seams and offset joints, maximizing draft protection.
After installation, the insulation should form an unbroken barrier with tightly fitting panels and sealed joints.
6. Insulate the Parapet
The balcony railing slab faces the outdoors and requires the thickest insulation—80 mm. It’s better to use a layered approach: 50 mm plus 30 mm sheets.

If space allows, mount a wooden frame over the second XPS layer, securing beams through insulation with anchors or dowels. If the windowsill is narrow, mount the frame on the 50 mm layer and place the second insulation layer between frame beams.
For plaster finishes, a frame may be unnecessary; apply plaster directly onto XPS after roughening its surface with a rasp or saw.
7. Insulate the Walls

A 50 mm XPS layer is sufficient for walls, cut to size with a sharp knife and interlocking edges formed similarly.
Insulating in two layers (30 + 20 mm) with a frame on top is ideal. If the window frame is flush with the wall, place the second layer between the frame beams.

No frame is needed if plastering; just secure sheets and roughen surfaces.
8. Insulate the Ceiling
The ceiling adjoins a neighbor’s apartment, not outdoors, so 50 mm XPS is adequate. Attach using adhesive foam, anchors, or glue. XPS is lightweight and adheres well.

Watch window height: thick insulation layers can prevent window sashes from opening if frames reach the ceiling without extensions. Leave a 5–7 mm gap after installation.
9. Insulate the Floor
Use at least 50 mm, preferably 80 mm in two layers, of XPS for floor insulation. Its high density supports loads up to 30 tons per square meter, serving as a solid base.

After insulation, lay plywood, particleboard, CSP, or OSB sheets before installing flooring like laminate or linoleum. For film underfloor heating, add a reflective underlay like penofol.

For tile or porcelain stoneware, pour a reinforced cement screed over XPS with optional embedded heating cables or mats. Thin heating elements can be installed in the tile adhesive layer.
Balcony floors are usually lower than room floors. To level them, install wooden beams (50 × 50 mm or 40 × 40 mm).

Start with cross beams spaced 40–60 cm, anchored to the slab. Fill gaps with insulation and foam, then attach longitudinal beams, level them, add a second insulation layer with foam, and cover with plywood or similar.
10. Finish the Interior
Finally, finish the ceiling, walls, and floor. For plaster, apply reinforcing mesh over roughened XPS, then two plaster layers and paint.

For paneling with wood, PVC, or MDF, fix materials to the wooden frame on walls and ceiling.

For wallpaper, install moisture-resistant drywall on a frame, fill joints with putty, prime surfaces, and apply wallpaper.
11. Install the Final Flooring
The last step is laying the finish flooring. Install laminate or linoleum on the prepared base. If using underfloor heating, install it first, then add baseboards.

Tiles are an exception due to wet installation processes; install them during the floor insulation stage before finishing walls.
*Note: Meta Platforms Inc. and its social networks Facebook and Instagram are restricted in some regions.
Explore useful articles in DIY as of 10-04-2022. The article titled " Transforming a Cold Storage Balcony into a Cozy Additional Room: How to Insulate Your Balcony " offers in-depth analysis and practical advice in the DIY field. Each article is carefully crafted by experts to provide maximum value to readers.
The " Transforming a Cold Storage Balcony into a Cozy Additional Room: How to Insulate Your Balcony " article expands your knowledge in DIY, keeps you informed about the latest developments, and helps you make well-informed decisions. Each article is based on unique content, ensuring originality and quality.